
When you’re baking bread at home, it’s very beneficial that you know how to properly hand-mix dough. The process in artisan bread making as well as ingredient selection are key. We’ve outlined and photographed how you can hand-craft your dough using a very simple bread recipe. However, the method is the same regardless of what kind of bread dough you’re making – whether it’s pizza dough, sourdough, wholemeal dough or steamed buns, you can use these techniques.
The Dough Ingredients
Measure your flour, yeast, salt and water. Then in a large mixing bowl, put your flour (we use Kialla’s organic unbleached flour), rumble the fresh yeast on one side, and empty the salt on the other side. Yeast and salt are not friends, so make sure that you keep them separate. Other than adding flavour, salt is also responsible for controlling the activity of the yeast and assisting in the development of gluten. Make a well in the middle of the flour and add the water. Combine the ingredients with a dough scraper, until it forms together. Hand mixing will also allow for subtle adjustments; add a little more water or sprinkle a touch more flour if the dough is too wet.
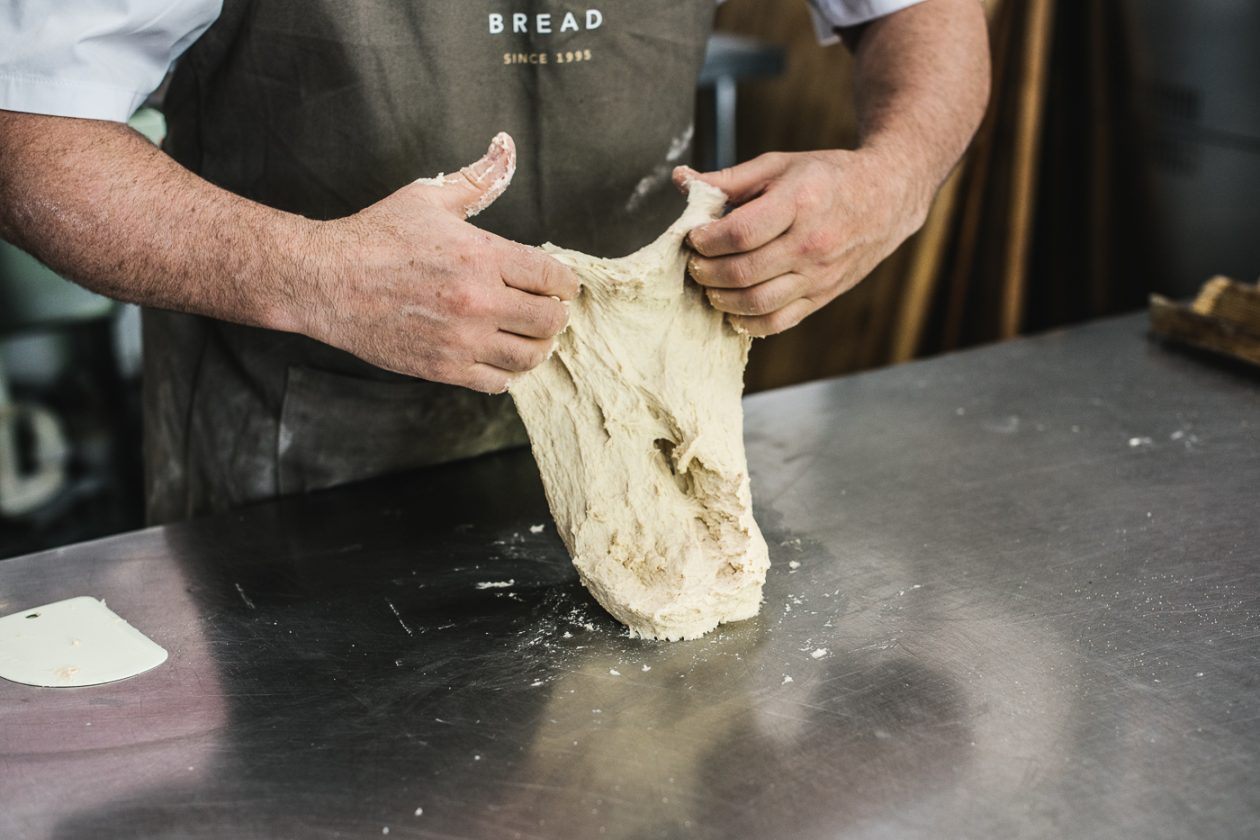
The Hand Mixing Process
Place the dough on a bench, and start folding the dough together. Don’t be afraid if it feels wet and sticky as this is perfect and a great start to creating soft bread. We recommend that you work the dough, as opposed to kneading the dough. This means you pick up the dough and throw it onto the bench, then fold it over and pull away. This way you’re aerating the dough by lifting and folding it. Do this for 2 minutes. Then hand-shape the dough into a ball and let it rest for 2 minutes. Repeat this process 4-5 times.
The Gluten Test
Make sure you check the gluten structure after you’ve worked the dough. When the gluten strands are weak, you can end up with heavy, dense bread. So a gluten test will determine if the gluten is properly developed and strong enough to trap the gases created by the yeast, just like the way balloon skin traps air. Create a gluten window by taking a piece of dough and stretching it out. If it’s very thin and doesn’t break, the gluten strands are strong. Check out the photos below to see what a strong gluten structure looks like.
Some Mixing Tips
The way you stand at your bench will also affect your mixing technique. If you’re right-handed, keep your right foot in front of your left, and your left hand secured on the bench. Use your whole body when working the dough – your body should be rocking back and forth. Another tip: you can use two hands using the same hand-mixing method if the dough is too heavy for you. Remember, take control of the dough; don’t let the dough control you! So move with purpose.
Dough Recipes
You can use any kind of bread recipe for this hand-mixing technique. You can experiment with our potato and rosemary schiacciata recipe or sourdough bread recipe.

Get yeast and salt ready

Put flour in a mixing bowl

Crumble yeast on one side, salt on the other side

Create a hole in the middle, and pour water into the middle

Combine with a dough scraper

Place dough on the bench

Work the dough by throwing, folding and letting go

Doughy hands are okay!

Hand shape dough into a ball and let it rest for 2 minutes

Work the dough again for 2 minutes using previous technique

Check the gluten window – this is a weak gluten structure

This is a good gluten structure

When your gluten structure is right, let the dough go through first fermentation